Build your own bank selection page
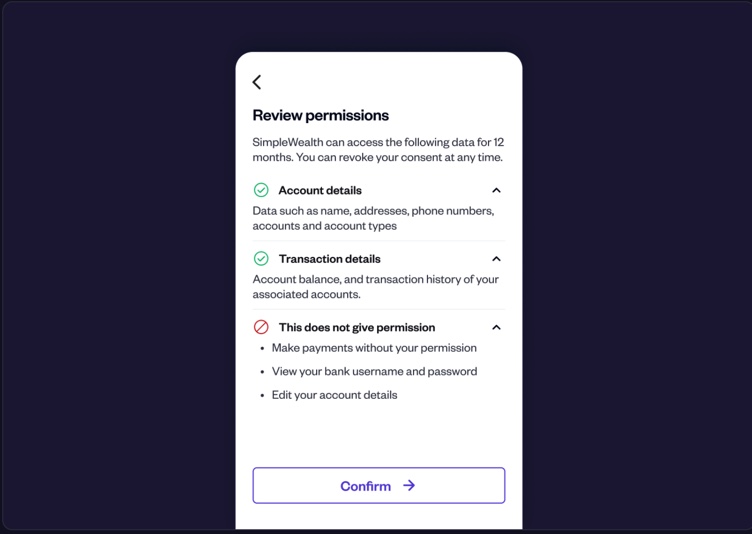
OverviewUse the guide below to understand how to create your own bank selection page in the application. Doing so will land your user directly on the Permissions screen before redirection to the bank.
- Find the list of supported banks in the Providers API. The API response includes key details such as bank name, display name, logoURL etc that can be used to design your own bank selection screen.
  "providers": [
    {
      "providerId": "BANKA",
      "name": "BANKA",
      "displayName": "BANKA",
      "logoUrl": "http://BANKA.com",
      "countryCode": "BHR",
      "aisStatus": "UNAVAILABLE",
      "pisStatus": "AVAILABLE"
    },
    {
      "providerId": "BANKB",
      "name": "BANKB",
      "displayName": "BANKB",
      "logoUrl": "http://BANKB.com",
      "countryCode": "BHR",
      "aisStatus": "AVAILABLE",
      "pisStatus": "UNAVAILABLE"
    }
  ]
}- Call the Create Intent API as below with the providerId in the request once the user chooses a bank to conenct to.
curl --location --request POST 'https://api.sau.sandbox.tarabutgateway.io/accountInformation/v1/intent' \
--header 'Authorization: Bearer <your_access_token>' \
--header 'Content-Type: application/json' \
--data-raw '{
    "user": {
        "customerUserId": "7982364",
        "email": "[email protected]
        "firstName": "John",
        "lastName": "Snow",
    },
  "consent":{
    "providerId": "BLUE"
  },
    "redirectUrl": "http://override.me/notDefault"
}'- The Connect URL returned in the response when embedded into the customer application will open up the permissions screen

Updated 7 months ago
